
I use Corel PaintShop Pro because it fits my needs. It is easier and cheaper to use than a heavy-duty program like Photoshop. Also, you don’t have to be on a subscription to use it.
If you’re a professional graphic artist, then Photoshop is a wise investment. When you are making money as a professional then you should invest in the best you can get.
Hands down Photoshop is the overlord of graphics programs. So if you’re making a living creating graphics, then you should get it.
But for those of us that need a program to blog with, it can be…overkill. You don’t need a program that is massive to get the job done.

The Power of Pictures on Your Blog
According to Jeff Bullas site(https://www.jeffbullas.com/6-powerful-reasons-why-you-should-include-images-in-your-marketing-infographic/), Blog posts with images get 94% more views than those without.
When you consider how competitive writing for the Web is, you need every trick in the book to keep eyes on your site.
Hence, images can help you do that. And if you can make them interesting, you’ll increase your chances of keeping people on your posts.
Why You Need to Use Corel PaintShop pro Images in Your Blog Posts
Explain Ideas Better – When you’re trying to explain something, images can make it so much easier to get your point across.
Having taught students from kindergarten through college, I can tell you this is true.
If you can use an image to convey an idea you’ll make a deeper connection. It will also make it clearer and quicker to understand.
Breaks Up the Content – Any copywriter will tell you that breaking up content in a piece of writing will help.
If a reader goes to your page or post and sees nothing but large blocks of text, they’ll probably leave. Most people, when faced with a large page of text, get tired just looking at it.
Using relevant images will relieve a reader’s anxiety about reading a bunch of words. Good examples of this are posts by Neil Patel.
He is one of the top experts in the field of Internet marketing and he highly recommends using quality graphics on blog posts.
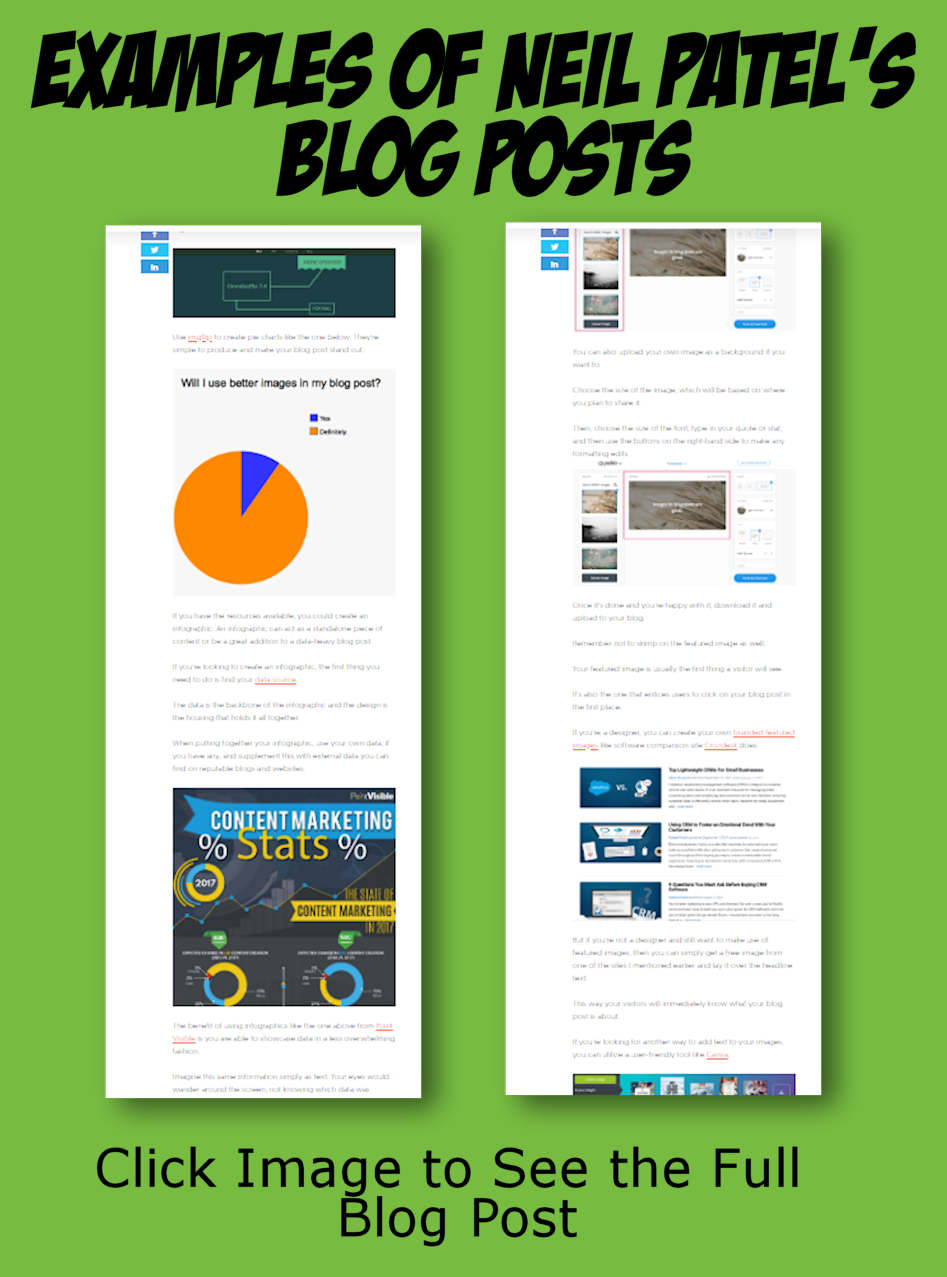
As you can see, Mr. Patel uses images a lot.
(By the way, I used Corel PaintShop Pro to create the image above. It took me 5 minutes.)
Make Your Site Look Professional – If you use quality images in your posts or web pages, it can make you look more professional. The more your site looks professional, the more authority you’ll have in your niche. Having more authority in your niche will help you get more traffic.
See how that works?
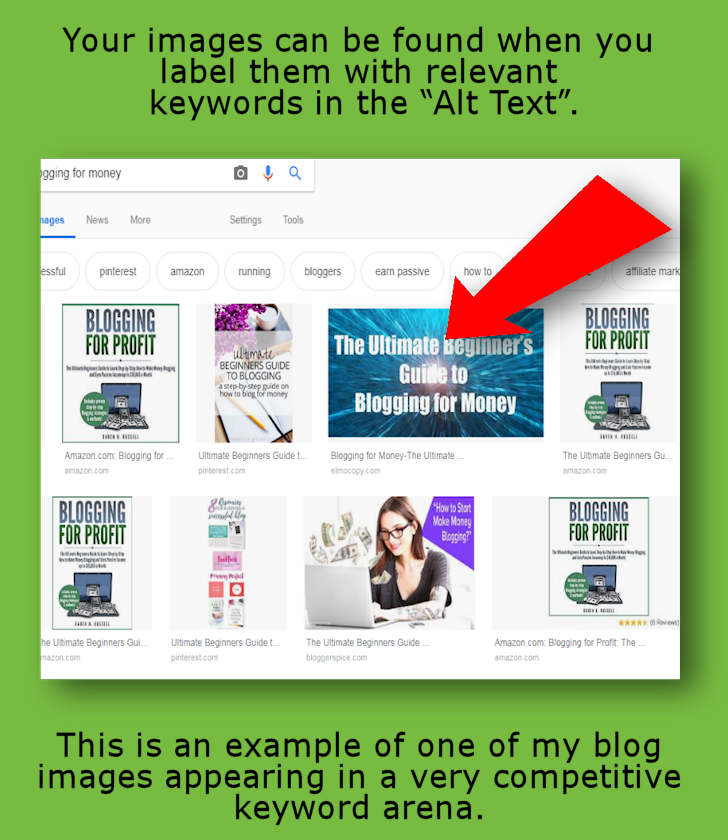
Helps Your Site with Search Engine Optimization – With a few simple tricks, you can get your images categorized by the search engines. This will make it easier for readers to find your pages.
Your images can be found when you label them with relevant keywords with “Alt Text”.
(I will show you how to do this later in this post.)
How to Start Using Corel PaintShop Pro Right Now
Corel comes out with a newer, sexier version of PaintShop Pro every year. Graphic artists are addicted to better programs with more bells and whistles.
Because of this, people can get quite confused with which version they should use.
I have been teaching this program for years, and I can tell you they are all pretty much the same.
Generally, if you have an earlier version of Corel PaintShop Pro it’s going to be like the new version.
I’ve heard that Corel PaintShop Pro 2019 is great, but I’m still using 2018. I can’t imagine it being that much different in just one year.
But that’s just me…
Using Corel PaintShop Pro to create images for your blog is super easy.
In, this section I’m going to show you how you can create simple images to reinforce a point or to help break up the text.
The first thing you’ll want to do is grab an image that either you have taken yourself or from an online source.
Note: Do not take images from an online source that you are supposed to pay for. If you pay to use images that are from an online vendor, fine.
But if you are going to take images from any online source, make sure they are royalty free or that you pay for them.
Step 1: Get an image to edit in Corel PaintShop Pro.
If you’re not taking your own pictures, you can get them from any of the free image sites.
I use Pixabay a lot. Pixabay has got great high-quality images that are 100% free. Because they are free many bloggers grab and use them. I’ve even seen some of the bigger dogs in the blogging world use these images.
If you’re serious about looking unique, you don’t want to look like everyone else.
I’m going to show you how you can use Corel PaintShop Pro to make them look different than everyone else’s.
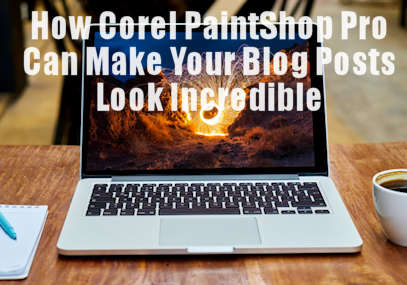
(Since I need an image header for this post, let’s make one.)
Type in a term to Pixabay’s search window to begin your search. In this case, let’s use “computer”.
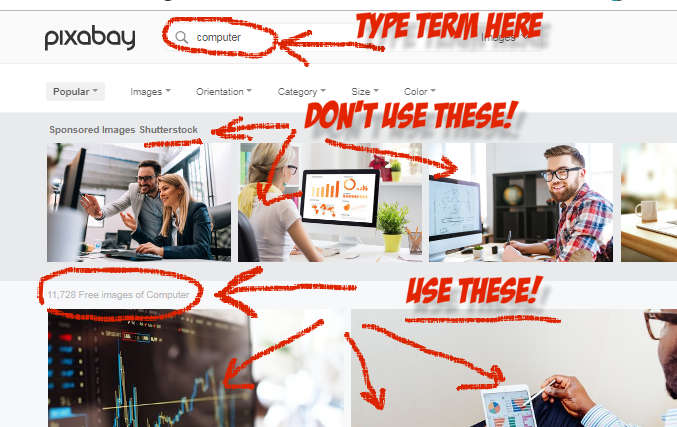
When the images pop up you’ll see a page of them you can use.
WAIT!
Don’t use the pictures right under the search window. Those are paid advertisements for Shutterstock. You have to pay Shutterstock to use those images.
One of the problems with using a paid company is that you can’t change them; you have to use them as is. So your pictures will look like everyone else’s that paid for them.
Also, if you’re a beginning blogger, the price of using these images may be out of your range.
When you use Corel PaintShop Pro to fix up the royalty-free images you’ll have unique graphics that no one else has.
If you look below the Shutterstock listing you’ll see pages of royalty-free images that you can pick from.
To get a copy of Corel PaintShop Pro 2018 click here: Tips and Tricks PSP 2018
Step 2: Alter the Image You Have Chosen in Corel PaintShop Pro

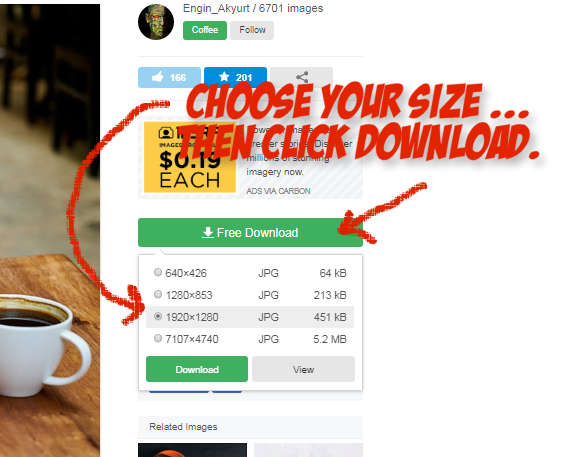
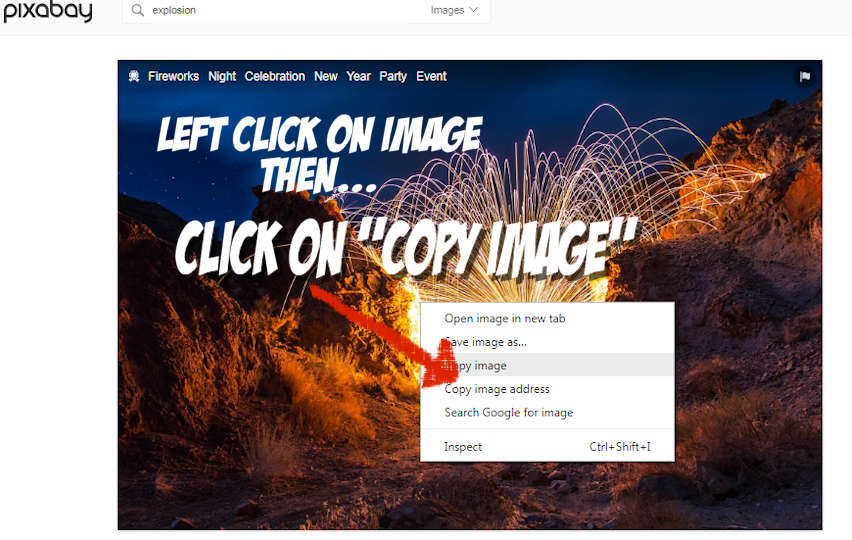
Now that we’ve chosen an image, we can now download it from Pixabay.
Click on the “Download” button.
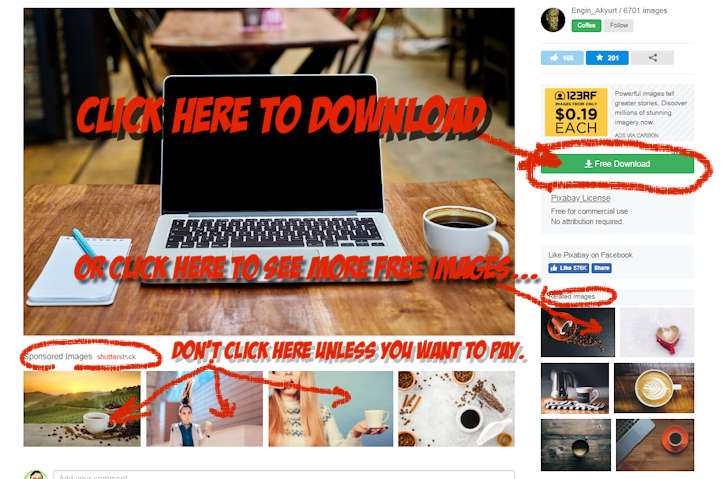
You can pick the size you want for your image. Usually, I choose a mid-range to large size.
Next, click on the “Download” button.
Step 3: Adding Another Image by layering
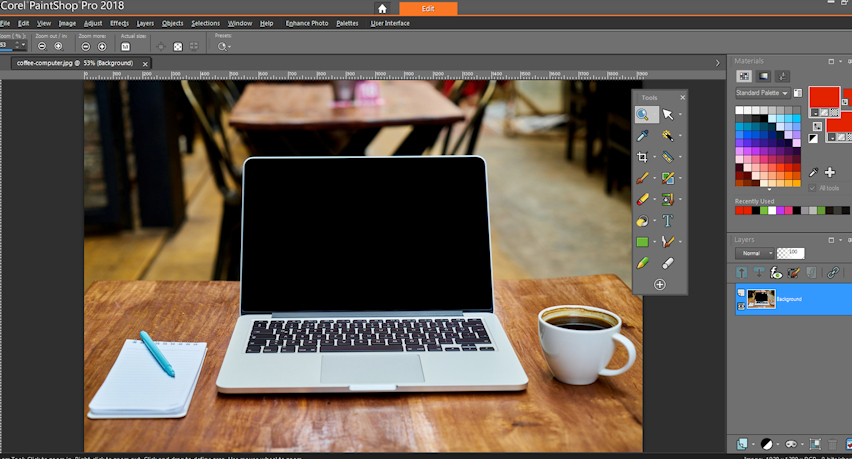
Now, go back to Corel PaintShop Pro and instead of having to open a file, you can click on “Edit” in the menu. In the drop-down menu under “Edit”, click on “Paste as New Image”.
When you do this, your entire screen will be pasted into Corel PaintShop Pro. Next click on the cropping tool in the tool palette.
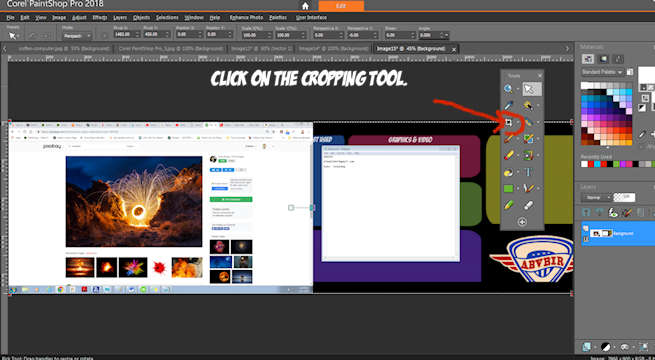
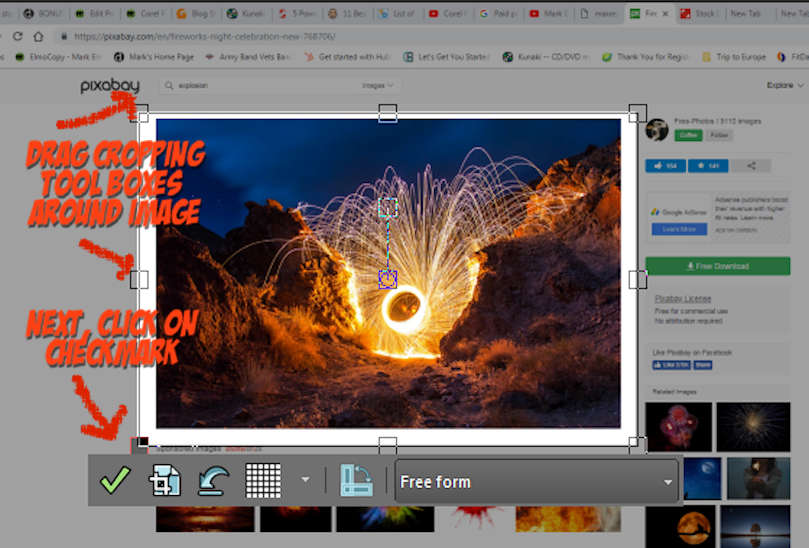
In the image below you can see the entire image pasted from the Pixabay site into PaintShop.
Note: Don’t let this image confuse you, the entire picture is in the PaintShop program and you are cropping only the part of the image you need.
Using PaintShop’s cropping tool drag the boxes around the part of the copied image you want. Next, click on the green check-mark under the image to crop it.
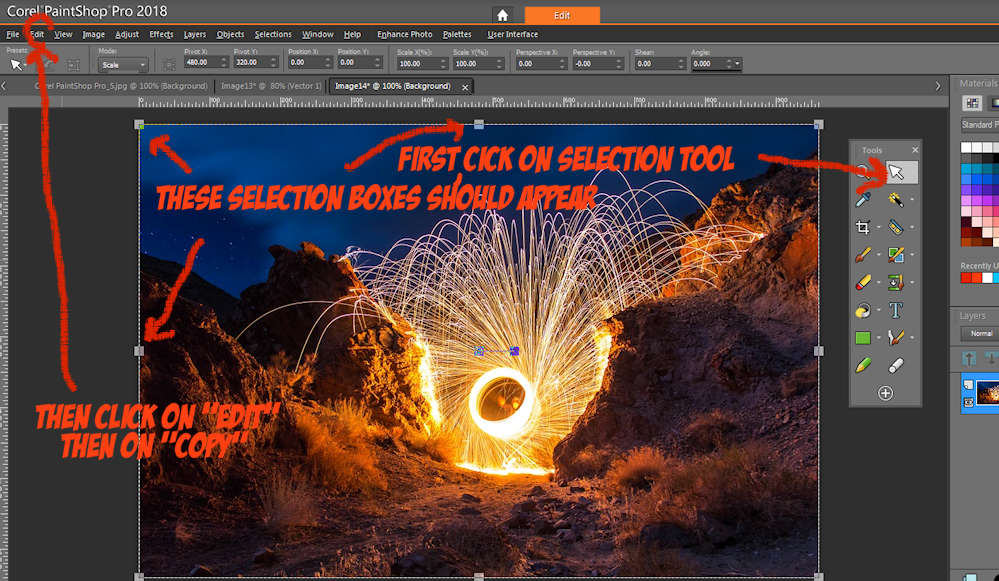
Once you get your image cropped you can then select it using the selection tool.
You’ll see little boxes around your cropped image.
Now, click on “Edit” in the menu and in the drop down, click on “Copy”.
How Layers Work in Corel PaintShop Pro
The cool thing about programs like Corel Paint Shop Pro is you can layer images on top of one another. Because of this, you will be able to make some very interesting pictures.
Using layers is like having a stack of transparencies.
Imagine that you have clear pieces of plastic stacked on top of each other. Each transparency has something different on each layer.

Once you have your images layered, you can also adjust the opacity.
As you’ll see in a second, you can also alter the opacity of the layers as well. This will make your picture even more interesting.
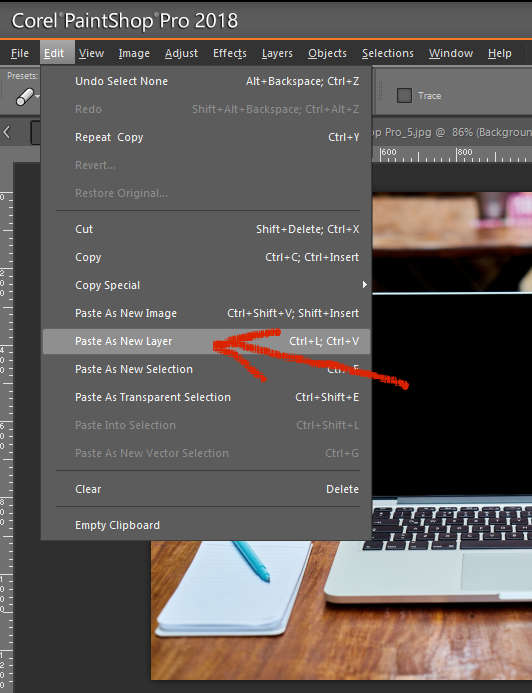
Getting back to our original image, we can now paste the copied layer into the image we want to use for our post header picture.
Go back to our header image and click on “Edit” in the menu. In the drop-down menu, click on “Paste as New Layer”.
Once you click on “Paste as New Layer” you’ll see the fireworks image on top of the computer image. You can then adjust the opacity. I slide the opacity bar down to 87% so you can see how layers work.
Corel PaintShop Pro will show you in the Layers Palette where your new layer is.
Now all we have to do is adjust a few things and we’ll be done.
Step 4: Adjusting the Top Layer of your image
The next thing we have to do is adjust the top layer of the fireworks image so that it fits onto the computer screen.
Click on the “Pick” tool first and then in the Tool Control Panel, click on “Shear”. I’m leaving the opacity of the layer at 87% because it makes it easier to see where I’m placing it.
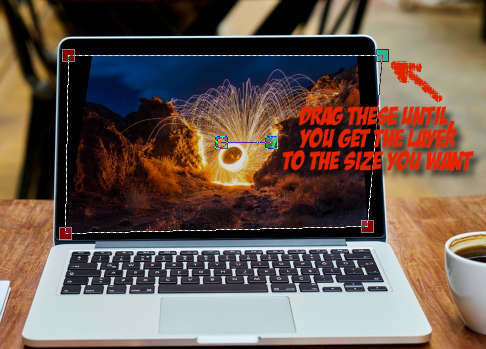
The reason why we are using “Shear” is because the screen on the laptop is leaning back a little. This will allow us to fit the fireworks layer into the computer screen better. Simply drag the little boxes around until you have your layer the way you want it.

I adjusted the opacity up to 100% so that the fireworks layer would appear brighter.
Now all I have to do is use the text tool to add some text and use a blur filter and we’re done.
Click on the “Text” tool in the Tools Palette. You can then select the font that you would like to use for this header.
Tip: Try to use words in your header images. This will help convey what your post is about without worrying too much about how the words will impact your SEO. Search engines can’t read text that’s placed on a graphic…yet.
Adding text to your image is very simple. All you have to do is click on the “Text” tool in the “Tools” palette and then select the font you want to use.
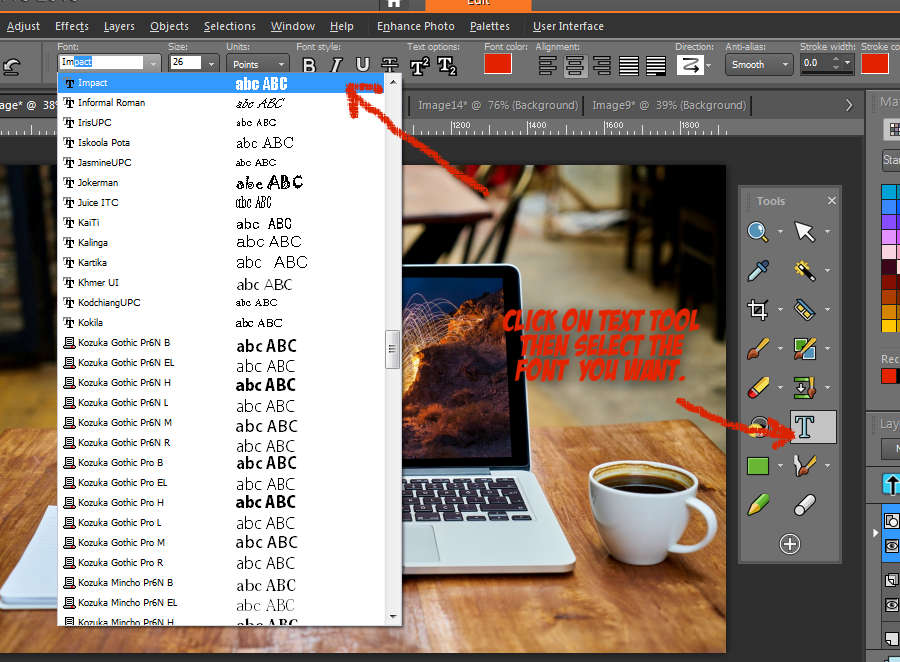
Just type in the words you want to use in your header image. PaintShop will automatically create a new layer for your text when you do this.
Now our header image is ready to be posted to the top of the blog post.
Conclusion
There is so much more to Corel PaintShop Pro that it would take volumes of writing and examples to show it all.
The main idea of this post was to show you how easy it is to use this program to create unique images for your blog.
If you want to learn how to use PaintShop Pro in a very short period of time, please check out my course here: PaintShop Pro 2018 Tricks and Basics Made Easy.
Please Comment Below
If you’ve had any experiences with PaintShop Pro, we’d love to hear from you. Please feel free to share what you know with us in our comment section below.